The Sketches


The Storyboard

The Wireframes

Insight
I’ve decided to look at prototyping the speech recognition cooking system that helps a user with cooking and managing kitchen appliances. The assignment told us to think back through our quarter and pick a prototyping technique that we felt was most appropriate for the task at hand. However, when I got around to tackling this assignment and trying to find the best method for prototyping this assignment, I ultimately decided that my ideal approach would not be a “method” but rather methods.
In progressing through this quarter, I ultimately not only got exposed to a variety of techniques but also realized how well many of them of compliment each other. To start, as with most projects, I found it appropriate to catch this system in action. When it came to sketching my prototype, I found the technique of parallel prototyping to be most handy. When I started, I had several ideas of what the Voice Chef System could look like. As you can see from the uploaded sketches, I had several ideas of how the device would be shaped and installed. This included a desktop like screen, or more fixed screen that could push in and out of a table, and a mounted screen. My first idea was to have it push out of a table and if I were to have immediately taken a serial prototyping approach, I would have straight away tried to iterate on this idea. But instead, I took a parallel approach with my sketches that allowed me to visualize several ideas at once and upon further sketch prototyping, I found that a wall based version made most sense to me. Parallel sketching at first let me look at the system from enough perspectives so I could truly feel continue with the direction I chose to go in and from there I could shift to a more serial based approach and try to iterate on that.
Speaking of which, once I had decided on the wall mounted system, the next step I took in prototyping the system was to make a prototype of it in storyboard form. When looking at low fidelity approaches, I also could have considered making user flows, but I ultimately decided to go with storyboards. Both approaches excel at helping a designer try to visualize the processes of the thing they want to create. However, when it came to this assignment, I felt the priority was less to try and map out every practical scenario and more to simply make a fundamental showcase. A user flow would have had me think of all the potential scenarios a user could encounter with the system rather than thinking of how to create a vivid and definitive scenario that showcases what the application would be all about. This is where I found the storyboard to excel as it not only gave me a way to convey the fundamentals visually but its structure was more conducive to showing and detailing a single task. Here I chose to show the task of heating the stove and getting instructions to make macaroni and cheese. With user flows I would be thinking more of all the potential routes the system could have the user go rather focusing on how this one particular route goes. The storyboard gave me the capacity to showcase how this task goes and visualize the system’s potential.
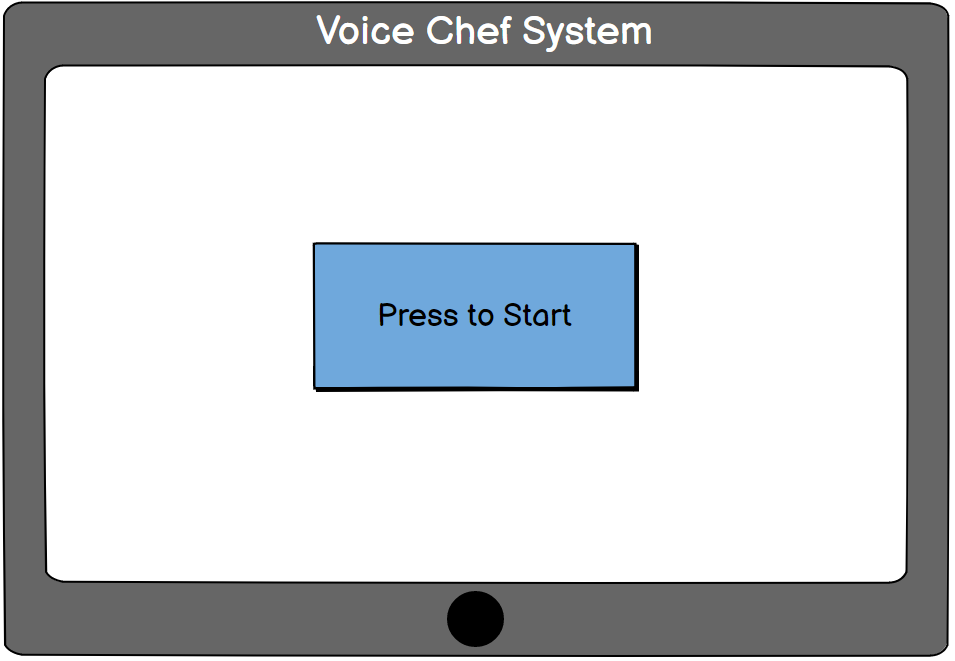
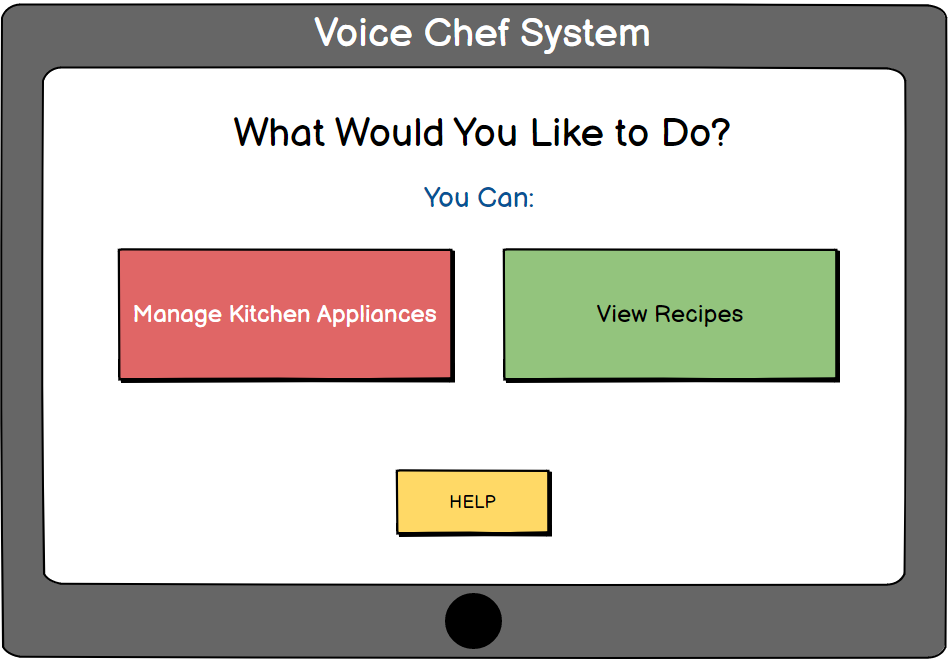
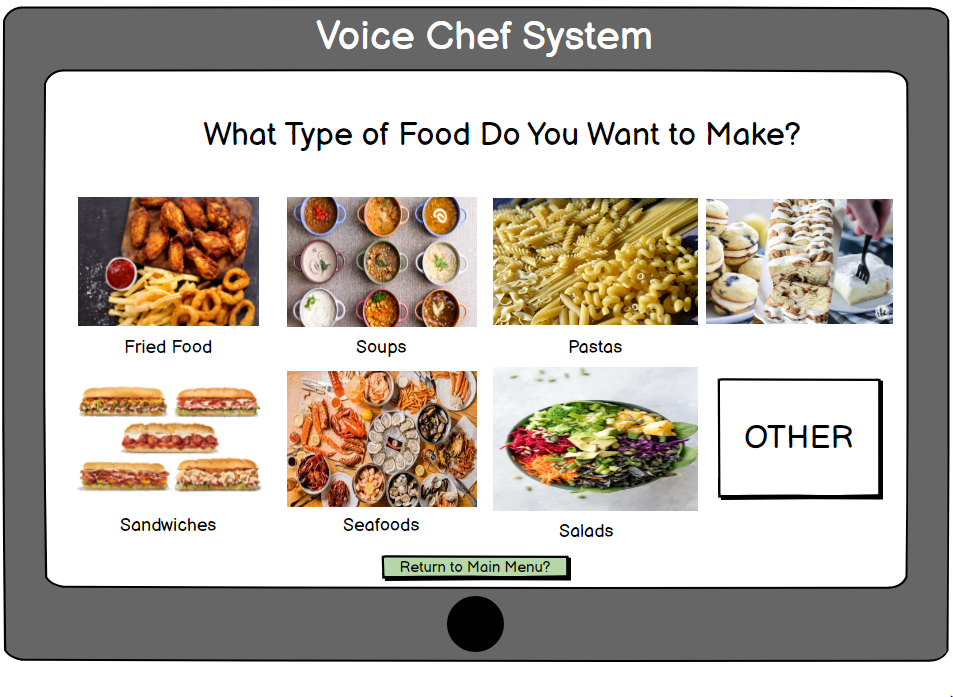
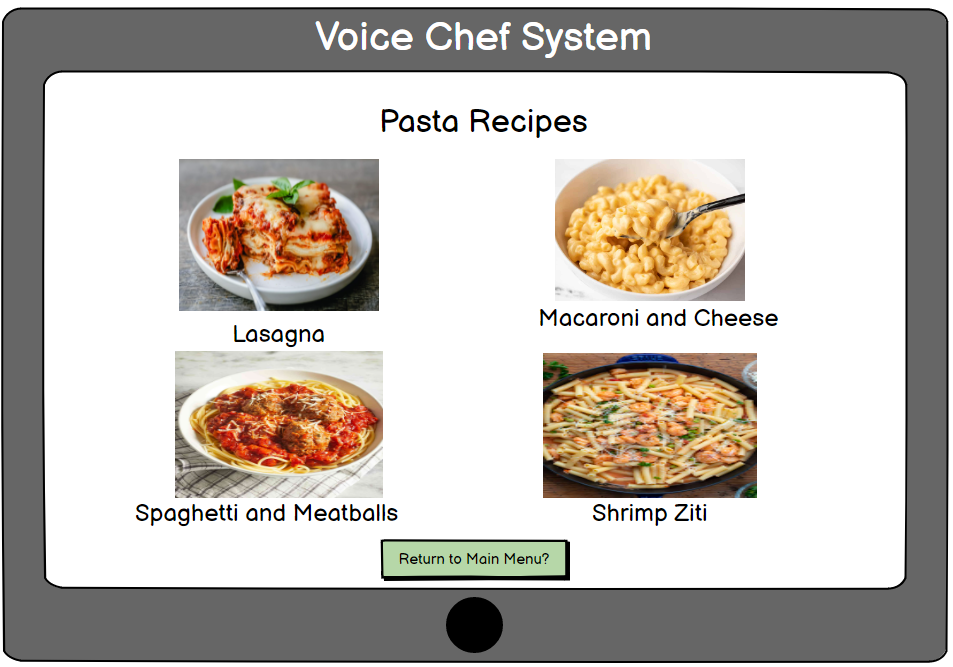
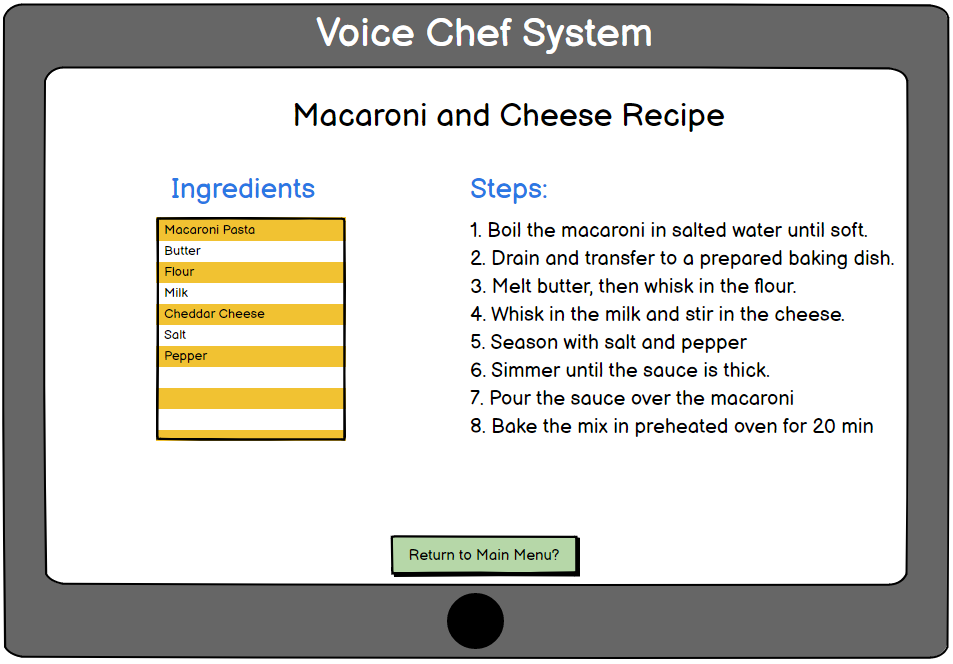
And on the matter of visualization, that takes me to the last major step I took with showcasing system: wireframing the device’s screens. As I looked to iterate at this point, this felt like the logical last step take with this assignment as I felt it advanced some of the strengths of the story board while avoiding the issues of other approaches like a physical prototype and video tape. Like the storyboard, the wireframes give me the capacity to visual elements of a specific task to showcase how the system can look in practice versus being concerned with how all its scenarios will look. And it feels more appropriate to do this than make a physical prototype because the device itself is not really the central point of the idea. Whether the device is shaped like a rectangle or square or has many buttons vs a single power button is less of concern than showcasing how a user interacts with it and how the device responds to the user. The storyboard and by progression wireframes allow me to do this while not getting caught up with more trivial aspects like the physical prototype. A video tape of the process offers more value since it’s effectively an in motion version of my storyboard but I ultimately found more value in the wireframes cause while a video can be a convenient and vivid way to showcase features, it ultimately is just a fancy version of the storyboard. By contrast, the wireframes gives me greater freedom to showcase the screens of the system which represent the application responding to the users’ speech. Something that the storyboard doesn’t have as much capacity to do. Hence I deemed to wireframe to be an effective way to round out my prototype for the point of time I was in with the process.
